Here's How We Make Our Vintage Bike Replicas
It may interest viewers to see what goes into making these shapes, and how they differ from the other plasma and laser cut silhouettes on the market. Contrary to popular belief, it’s substantially more complicated than simply scanning a photograph or importing clip art.
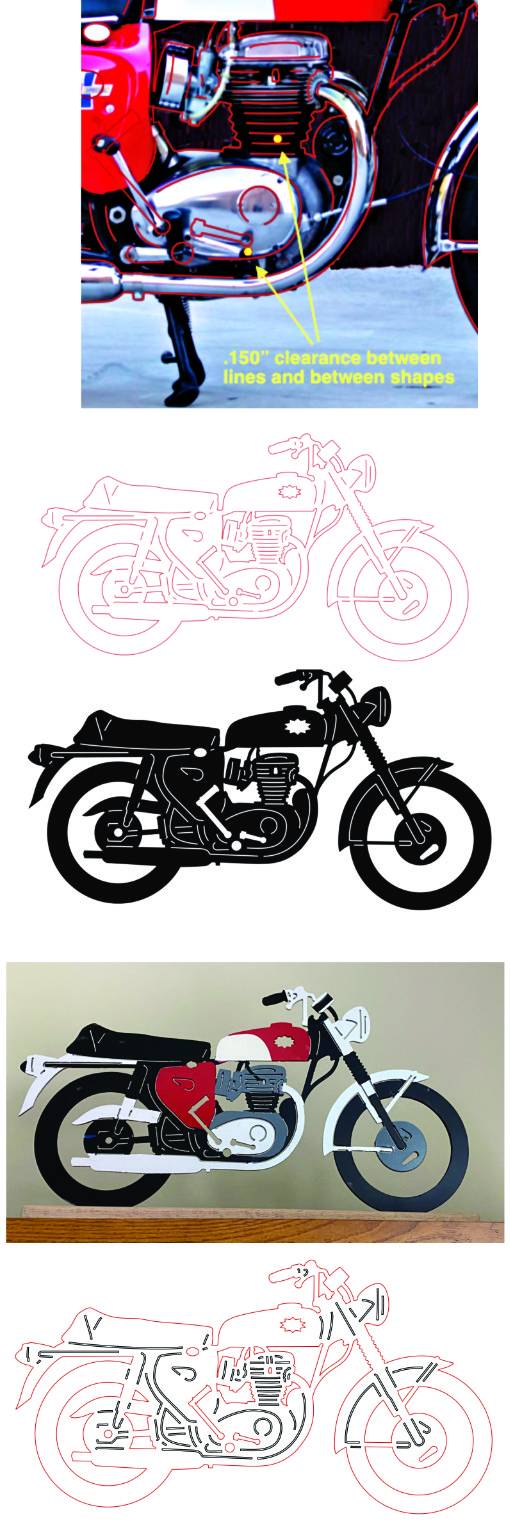
First, a photograph is selected that shows a clear profile of the motorcycle model to be copied. Photos are taken from a particular vantage point. The closer the camera is to the object being photographed the greater the distortion of the image due the effects of perspective. It is best to use a clear picture taken from a distance.
Not all the lines and internal shapes in a motorcycle image can be traced. There are too many, and they are often too close together for our purposes. It’s necessary to determine which lines are most significant and represent the profile in the best manner. Some components in the photo are in front of other components, and this must be reflected in the way the lines are drawn.
We first create the designs for the plasma process, which requires a minimum of .150″ between lines and shapes to keep cuts from overlapping and parts falling out. This requires many of the lines in the design to be moved slightly from their corresponding positions in the photo. The top photo illustrates this in the position of the gear shift lever. An enlarged duplicate of this image is below.
The top photo (large images below) shows the traced outline of the bike with the lines (in red) which have been drawn over the significant parts. They have all been positioned so as to leave at least .150″ clearance between them. The little yellow circles are .150″ in diameter and are moved about to make sure they fit between all parts.
The second image has black fill applied to provide a preview of what the cut piece will look like.
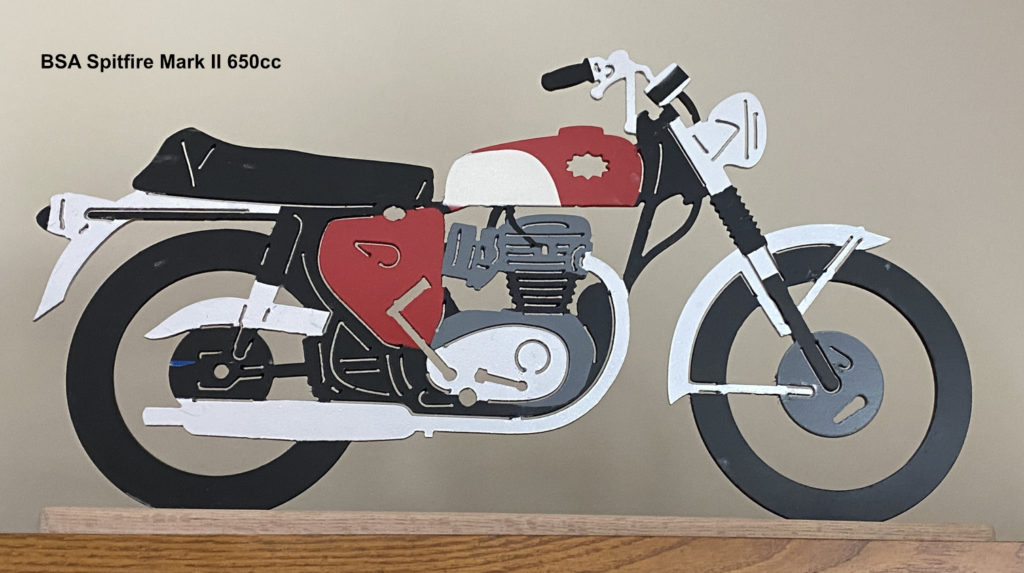
The third image is a photo of one of the vintage bike replicas, in this case painted. When cut with the CNC plasma process, the completed piece had to be approximately 19″ long to fit in all the detail. As mentioned elsewhere, we had a number of these shapes laser cut in the smallest size possible.
This was more difficult than it sounds. Because the kerf (cut width) of the laser is so narrow, a cut line would be almost invisible in the finished piece. Therefore, all the internal lines had to be converted into elongated slots, as shown in the bottom illustration. Again, a larger image is below. The lines that were converted to slots are shown in black.